SelfTechy

A portal for self learning

Monthly Archives: June 2011

Parameterization of Tests in Selenium IDE


Selenium IDE is a Mozilla Firefox add-on which can be utilized to record tests.  These tests can be saved in a folder and executed later in a batch mode.  But the problem we face with this is values such as login username, password, application URL, etc need to be hard coded.  In order to overcome this problem we can store the parameter values in a Javascript file (file.js) and that has to be added to Selenium IDE extension.  In the Selenium Test “storeEval” command should be used to utilize the parameter declared in the .js file.  We will have look at this parameterizing technique in detail.

Create a text file and copy and paste the following code in it.  Then save it as “TestData.js”

searchvar="selenium,selftechy,parameterization"
appurl="http://www.google.co.in"

Open a browser and open the Selenium IDE (here I am taking the liberty of assuming that Selenium IDE is being installed in your system)

SeleniumTestSource

Click on Selenium IDE “options” –> “options”.  This opens up “options” screen, there click on “Browse” button of “Selenium IDE Extensions” and then select the above “TestData.js” file (not GoogleSearch Selenium Test).  After selecting the extension, Selenium IDE needs to be closed and restarted.

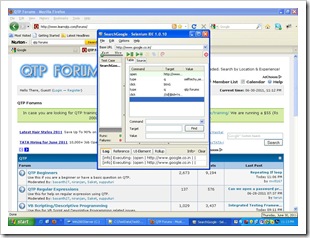
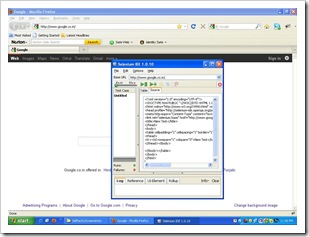
Open the Selenium IDE again and click on the Source Tab and that should look as in the above picture.

Now, copy and paste the below code into it and then save it as “GoogleSearch” (File—>Save Test Case As):

<?xml version="1.0" encoding="UTF-8"?>
<!DOCTYPE html PUBLIC "-//W3C//DTD XHTML 1.0 Strict//EN" "http://www.w3.org/TR/xhtml1/DTD/xhtml1-strict.dtd">
<html xmlns="http://www.w3.org/1999/xhtml" xml:lang="en" lang="en">
<head profile="http://selenium-ide.openqa.org/profiles/test-case">
<meta http-equiv="Content-Type" content="text/html; charset=UTF-8" />
<link rel="selenium.base" href="http://www.google.co.in/" />
<title>SearchGoogle</title>
</head>
<body>
<table cellpadding="1" cellspacing="1" border="1">
<thead>
<tr><td rowspan="1" colspan="3">SearchGoogle</td></tr>
</thead><tbody>
<tr>
	<td>storeEval</td>
	<td>searchvar</td>
	<td>searchvar</td>
</tr>
<tr>
	<td>storeEval</td>
	<td>appurl</td>
	<td>appurl</td>
</tr>
<tr>
	<td>storeEval</td>
	<td>sitelink</td>
	<td>sitelink</td>
</tr>
<tr>
	<td>open</td>
	<td>${appurl}</td>
	<td></td>
</tr>
<tr>
	<td>type</td>
	<td>q</td>
	<td>${searchvar}</td>
</tr>
<tr>
	<td>click</td>
	<td>btnG</td>
	<td></td>
</tr>
<tr>
	<td>type</td>
	<td>q</td>
	<td>qtp forums</td>
</tr>
<tr>
	<td>click</td>
	<td>btnG</td>
	<td></td>
</tr>
</tbody></table>
</body>
</html>

SeleniumTestIDE

After the above is done, click on the “Table” tab and that should look like as in the above picture.

In the above test I have utilized two parameters appurl and searchvar to parameterize the Search terms as well as web site URL.  This is a very much simpler form of parameterization of Selenium Tests.

Selenium – Learn Java to Enhance Test Automation Skills


Selenium is a Test Automation tool for Web Applications.  Selenium IDE is an Add-on for Mozilla Firefox.  Using Selenium IDE we can record and playback tests.   Recorded tests will be in a table format.  This can be exported into various programming language formats such as C#, Java / JUnit, Groovy, PHP, Perl, Python, Ruby, etc.

Learning one of these programming languages will be greatly helpful for automating tests with Selenium.  Java is a powerful programming language which gives the power of flexibility & extensibility with lot of open source libraries for various tasks.  With Java we can customize the error handling, logging, reading from external data sources, generating reports, etc.

To start learning Java the first step will be to download Eclipse IDE and Java SDK and install on the desktop.

Eclipse IDE is an open source integrated development environment where Java coding, compiling the source, debugging, executing the programs is very easy.  We can add number of java libraries to build path and start using the classes / methods in our programs.

I am planning to start posting on Core Java which enables testers who want to learn Java just for the purpose of automating tests with Selenium.   I think learning the Core Java concepts like Variables, Classes, objects,  methods, inheritance, polymorphism, constructors, method overloading, etc will be of great help for the beginners of Selenium.

Ant – Build Process Automation


Software build is the process of creating and packaging binaries for the software release.  To make the build process completely consistent and repeatable, the process should be automated.  There are various tools available for the build process automation.

Build tools are used for the process of automating mundane activities such as:

  • Compiling source code
  • Packaging the binary files (i.e.  JAR / WAR /EAR files)
  • Running tests (Executing unit tests / UI tests)
  • Deployment of the application to containers such as JBoss, WebLogic, WebSphere, Tomcat, etc
  • Creating documents

Below are some of the tools available for build process automation:

  • Apache Ant
  • Apache Buildr
  • Apache Maven

Apache Ant is an open source build tool used for automating build process by Java development teams.  This uses XML for the build process.  Ant script that is used for build process is named as “build.xml”

Following is an example of “build.xml”:

<project name=”LearnANT” default=”display” basedir=”.”>

<target name=”display” >

<echo message=” Base Directory = ${basedir}”/>

<echo message=” Author: = Seetaram Hegde”/>

<echo message=” Source: = http://www.selftechy.com”/&gt;

</target>

</project>

In the above example, target tag is something which needs to be parameterized while executing the ANT command.  For example, if the build.xml is located in C:\ then go to respective directory and then execute Ant {target} and press enter that executes the build.xml with the target specified after the Ant command

Execute this simple build.xml file with ANT and I think this will be the first step in learning Ant

Learn Selenium Step by Step


Selenium is an open source web application Test Automation tool.  Learning Selenium is very easy.  Anybody who worked on manual testing can easily learn Selenium.  We will try to explore how to learn Selenium Step by Step.

Selenium has three main tools – Selenium IDE, Selenium RC, and Selenium Grid.

First let us have a look at Selenium IDE

Selenium IDE – This is a Firefox Add-on (download from openqa download page).  Download Selenium IDE and install.

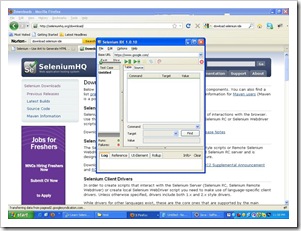
Once the IDE is installed, go to tools – > click Selenium IDE.  This opens up the Selenium IDE as below:

SeleniumIDE

Once this is done, close the Selenium IDE.

Now let us record a test:

  1. Open a new browser
  2. Navigate to www.google.com
  3. Click tools – > Selenium IDE (opens up IDE)
  4. click on Advanced Search link on Google search page
  5. type “selftechy” in “all these words:” edit box
  6. Select “20 results” from “Results per page” drop down
  7. Click Advanced Search button
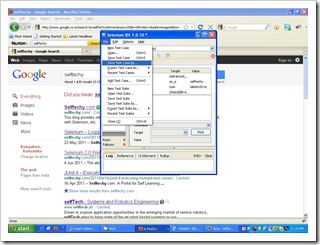
  8. Click on File (on Selenium IDE) – > Save Test Case As and then give it a name and save the test case

SaveTest

Selenium IDE has recorded around 3-4 test steps.  Starting from the first step – > right click on each step and then click “Execute this command”.  Execute all the commands one by one.

Try to record some more tests with even more complexity and also record more number of tests.  Then try to execute each tests as explained above.  By this way you can become more comfortable with Selenium IDE.  After this exercise we can go ahead and try to learn exporting the tests in different formats such as Java, JUnit, PHP, C#, etc and also setting up the Selenium RC with Eclipse.

Below are the drawbacks of using Selenium IDE for record and execute tests:

  1. If all the test steps are executed together then the chances of tests getting failed is more because of page load time / objects taking more time to appear on the web page
  2. Parameterization is difficult and values should be hard coded
  3. Maintenance is much more difficult, etc.

I have explained using Selenium RC and configuring Eclipse with Selenium RC in my earlier post – Setting up Selenium with Eclipse

For detailed configurations have a look at the above post.

Selenium – Use Ant to Generate HTML Reports


Apache Ant is an open source build tool. A build tool can be used to compile the source code, creating the build artifacts such as JAR, WAR, and EAR files.  Some of the other usage of ANT is to run unit tests, do the application deployment on containers such as JBoss, Tomcat, WebSphere, WebLogic, GlassFish, etc, and to run Automated Selenium Tests.

Ant is a powerful build tool and also is very much extensible.  There are several open source Ant libraries available which need to be just downloaded, unzipped, and copied (JAR file) into the Ant’s “lib” folder.  Once the library file is copied, then we can utilize the “Tasks” in the Ant’s build.xml file.  Ant’s “contrib library, jsch library, etc” are the best examples for such libraries.

Let us create a new project in Eclipse and write a build.xml file to execute the Java files in this project (For details on how to setup Eclipse, please visit How to Setup Eclipse for Selenium Test Automation):

  1. Create a new project – SampleTests
  2. Create a new package (under src) – com.selftechy.seltests
  3. Under this package, create new Java class – SeleniumTest.java
  4. Record a Selenium Test and export in JUnit 4 format as below
package com.selftechy.seltests;

import com.thoughtworks.selenium.*;
import org.junit.After;
import org.junit.Before;
import org.junit.Test;
import org.openqa.selenium.server.SeleniumServer;

public class SeleniumTest extends SeleneseTestCase{
	private static SeleniumServer seleniumServer;
	@Before
	public void setUp() throws Exception {
		selenium = new DefaultSelenium("localhost", 4444, "*chrome", "http://www.google.co.in/");
        seleniumServer = new SeleniumServer();
        seleniumServer.start();
		selenium.start();
	}

	@Test
	public void testGoogleSearch() throws Exception {
		selenium.open("/");
		selenium.click("link=Advanced search");
		selenium.waitForPageToLoad("30000");
		selenium.type("as_q", "selftechy, selenium");
		selenium.click("//input[@value='Advanced Search']");
		selenium.waitForPageToLoad("30000");
	}

	@After
	public void tearDown() throws Exception {
		selenium.stop();
		seleniumServer.stop();
	}

}

Let us try to create a build.xml file for execution of this Java class using Ant:

<?xml version="1.0" encoding="UTF-8"?>
<project name="test" default="exec" basedir=".">

	<property name="src" value="./src" />
	<property name="lib" value="./lib" />
	<property name="bin" value="./bin" />
	<property name="report" value="./report" />
	<path id="test.classpath">
		<pathelement location="${bin}" />
		<fileset dir="${lib}">
			<include name="**/*.jar" />
		</fileset>
	</path>
	
	<target name="init">
		<delete dir="${bin}" />
		<mkdir dir="${bin}" />
	</target>
	
	<target name="compile" depends="init">
		<javac source="1.6" srcdir="${src}" fork="true" destdir="${bin}" >
			<classpath>
				<pathelement path="${bin}">
				</pathelement>
				<fileset dir="${lib}">
					<include name="**/*.jar" />
				</fileset>
			</classpath>
		</javac>
	</target>

	<target name="exec" depends="compile">
		<delete dir="${report}" />
		<mkdir dir="${report}" />
			<mkdir dir="${report}/xml" />
		<junit printsummary="yes" haltonfailure="no">
			<classpath>
				<pathelement location="${bin}" />
				<fileset dir="${lib}">
					<include name="**/*.jar" />
				</fileset>
			</classpath>

			<test name="com.selftechy.seltests.SeleniumTest" haltonfailure="no" todir="${report}/xml" outfile="TEST-result">
				<formatter type="xml" />
			</test>
		</junit>
		<junitreport todir="${report}">
			<fileset dir="${report}/xml">
				<include name="TEST*.xml" />
			</fileset>
			<report format="frames" todir="${report}/html" />
		</junitreport>
	</target>
</project>

Looking at the above build.xml file makes you feel it is very much complex but that is not the case if it is understood properly.

Let us try to explore all the XML tags and attributes of the build.xml file.

basedir – value of this is “.” (just a dot or period) that is the path of the build.xml file.  i.e. In this example I have kept the build.xml file in the path – F:\Helios-Workspace\SelfTechy\SampleTests

default – “exec” – this refers to the default ant target which will be executed when there is no ant target is mentioned while executing the ant command in the command prompt. For example we can just say “ant” in the command prompt without specifying the target as argument.  If we need to execute a specific target then we can specify the target as “ant compile or ant init or ant run”, etc.

One more thing I want to clarify is “./”, this refers to the current working directory.  If you want to refer to any of the parent folder then use “../” in any of the ant targets.

Each <target> will have different ant tasks such as javac, mkdir, delete, junit, etc.  These are actually the actions performed on the Java code provided in the folders.

The Ant targets written in this build.xml file are exec, compile, and init.  In each of the <target> we have specified “depends” attribute which says Ant to execute the target specified first and then the current target.  Hence, Ant will be executing the different targets in a sequential manner.

init – This Ant target first deletes the bin folder and then recreates it.

compile – This Ant target compiles the java code in the src folder and then puts the binary (class) files in the bin folder.

exec – this executes the class files in the bin folder and then generates report folder and copies all the HTML / XML files into this folder.

Install and configure JDK and ANT

Before doing above all ANT and JDK has to be downloaded and installed on the system.

Download JDK from – JDK download link

Download ANT from Apache web site – ANT download link

Unzip the ant and copy to C:\Ant folder

Now we need to configure environment variables: ANT_HOME and JAVA_HOME

Copy the path to both Ant’s bin folder and JDK’s bin folder should be (C:\Ant\bin and C:\program files\Java\JDK\bin) copied to “path” environment variable.  System has to be restarted once after the environment variables are set.

Execute JUnit test from Ant and generate HTML reports

Go to command prompt – > navigate to folder where the build.xml is kept (F:\Helios-Workspace\SelfTechy\SampleTests) and then execute the following command:

F:\Helios-Workspace\SelfTechy\SampleTests>ant (press enter)

This should fire the Selenium tests and generate the HTML / XML reports and put them into the report folder.

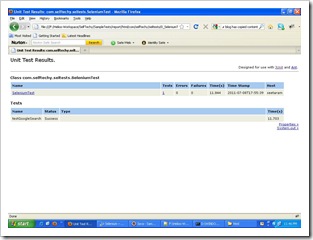
After the execution, it creates one more folder – > report and it contains HTML reports that should look as below:
JUnitReport

Creating configuration properties for Selenium Test Suite


Create a configuration properties file to store parameters such as log file path, test data path, results path, selenium execution speed, wait period, etc, then make changes to the parameters whenever needed.

Java provides a way to create configuration file for storing configurable parameters of an application.  Selenium Test Suite also needs such a file to keep global configuration settings.

In this post let us try to understand how we can create a “.properties” file and how to access values from the properties file.

Create a file text file (using any text editor such as notepad) Selconfig.properties (as in the file – view file) and save the file as “Selfconfig.properties

Create classes as in the following code snippets:

package com.selftechy.readdata;

/*
 * Author - Seetaram Hegde
 * 
 */

import com.selftechy.library.*;
import java.io.IOException;

public class TestRun {
	public static void main(String[] args) throws IOException {
		// TODO Auto-generated method stub
		config cfg = new config("F:\\Helios-Workspace\\Config\\SelConfig.properties");
		System.out.println(cfg.ReadProperty("ConfigPath"));

	}

}


package com.selftechy.library;

/*
 * Author - Seetaram Hegde
 * 
 */

import java.io.*;
import java.util.*;


public class config {
	  String str, key;
	  private String filepath;
	  
	  public config(String filepath){
		  this.filepath=filepath;
	  }
	  
	  public String ReadProperty(String propkey){
		  String propval="";
		  try{
			  int check = 0;
			  while(check == 0){
				  check = 1;
				  File cfgfile = new File(filepath);
				  if(cfgfile.exists()){
						  Properties props = new Properties();
						  FileInputStream propin = new FileInputStream(cfgfile);
						  props.load(propin);
						  propval=props.getProperty(propkey);
					  }
					  else{
						  check = 0;
				  }
				}
			  }
			  catch(IOException e){
				  e.printStackTrace();
			  }
		return propval;	  
	  }	
}


Save both the classes and then execute the first one (TestRun.java) as Java application.  In the Selconfig.properties file, TestData & ConfigPath are the keys and “F:\\Helios-Workspace\\TestData & F:\\Helios-Workspace\\Config” are the respective values.  In .properties file we can put comments using “#”.  Any sentence that starts with # will be considered as comment.

To access the values of any properties, use the “key” parameter.  For example, to access the value of “TestData” and “ConfigPath” write the code as follows:

config cfg = new config("F:\\Helios-Workspace\\Config\\SelConfig.properties");


cfg.ReadProperty("ConfigPath")

cfg.ReadProperty("TestData")

Parameterization of Selenium Tests with CSV file – Part II


In the previous post (view post)I have explained about reading a csv file and displaying its data on console.  Now, let us explore how to store some parameters in the csv file in the Key – Value format and then read the data into a HashMap.  Once the parameters and values are read into a HashMap how to use them in a Selenium test.

HashMap is a Java class (java.util.hashmap), which is fast and easy to use.  Hashmap stores the data in key value pairs.

In the following example, I have automated a scenario which does the following steps:

  1. Open browser
  2. Navigate to http://www.google.co.in
  3. Search for the word “selftechy”

In a csv file I have stored two keys AppURL & SearchVals and their respective values http://www.google.co.in & selftechy

Visit the same file at – SearchData.csv

Copy the data from the above as it is and then save the file as SearchData.csv

Let us have a look at the following code snippet. 

Create two java classes: CsvTestData.java and SearchResults.java

Copy the below code (first one) into CsvTestData.java and next one into the SearchResults.java

package com.selftechy.readdata;

import java.io.FileReader;
import java.io.IOException;
import au.com.bytecode.opencsv.*;
import java.util.*;

/**
*
*Author - Seetaram Hegde
*
*/

public class CsvTestData {
	private static String FILE_PATH;
	
	HashMap<String, String> parametervals = new HashMap<String, String>();
	
	public CsvTestData(String filepath){
		FILE_PATH=filepath;
	}
	
	public String getFilePath(){
		return FILE_PATH;
	}
	
	public HashMap<String, String> readcsvData()throws IOException {
		CSVReader reader = new CSVReader(new FileReader(FILE_PATH));
		String [] nextLine;
		int i=0;
		while ((nextLine = reader.readNext()) != null) {
			parametervals.put(nextLine[i], nextLine[i+1]);
			i++;
		}
		return parametervals;
	}
}


package com.selftechy.seleniumtests;

/**
*
*Author - Seetaram Hegde
*
*/

import java.util.HashMap;
import com.thoughtworks.selenium.*;
import org.junit.After;
import org.junit.Before;
import org.junit.Test;
import org.openqa.selenium.server.SeleniumServer;
import com.selftechy.readdata.*;


public class SearchResults extends SeleneseTestCase {
	private static SeleniumServer seleniumServer;
	HashMap<String, String> params = new HashMap<String, String>();

	//path to the below constructor should be the path of the "csv" file
	CsvTestData td = new CsvTestData("F:\\Helios-Workspace\\TestData\\SearchData.csv");
	@Before
	public void setUp() throws Exception {
		params.putAll(td.readcsvData());
		selenium = new DefaultSelenium("localhost", 4444, "*chrome", "http://www.google.co.in/");
        seleniumServer = new SeleniumServer();
        seleniumServer.start();
		selenium.start();
	}

	@Test
	public void testAdvancedSearch() throws Exception {
		selenium.open(params.get("AppURL"));
		selenium.click("link=Advanced search");
		selenium.waitForPageToLoad("30000");
		selenium.type("as_q", params.get("SearchVals"));
		selenium.select("num", "label=20 results");
		selenium.click("//input[@value='Advanced Search']");
		selenium.waitForPageToLoad("30000");
	}

	@After
	public void tearDown() throws Exception {
		selenium.stop();
		seleniumServer.stop();
	}
}


Once both the Java classes are created, right click on the second java class and Run As – > JUnit Test

The above example demonstrates how to use csv file for parameterization of Selenium Tests.

Selenium – Parameterization using CSV file


Parameterization of a Selenium test can be accomplished using various data sources such as XML, Database, Spreadsheet, flat file, CSV file, etc.  Among all of these techniques usage of XML, CSV, and spreadsheet are most widely used.  I have already discussed parameterizing Selenium tests using Microsoft Excel.  Let us discuss fetching test data from a CSV file.

CSV is an acronym for Comma-Separated Values.  The CSV file format is used to store data in tabular format and the data is stored in a plain textual format.  Reading and writing into a CSV file is same as reading / writing into a flat file.  There is an OpenCSV API (a very simple csv parser library for Java) which supports reading / writing into a csv file.  This library provides various classes and methods for accessing data in a csv file.

OpenCSV Jar file can be downloaded from Sourceforge – Download OpenCSV

After downloading the Zip file, unzip the file into a directory.  Go to project properties in Eclipse IDE (Right Click the project to which you want to add this library – > Click properties – > Click Java Build Path – > Libraries – > Add External Jar – > Select the unzipped opencsv.jar file)

An import statement should be added as – > import au.com.bytecode.opencsv.*;

Following this we can start utilizing the open source library for csv.

I have also uploaded a csv file to be used as a test data.  Create a csv file with the same data.  Open a notepad copy and paste the data and save as .csv file.  Then the path of this file should be used in the following code snippet. (view the products.csv file at –  products.csv)

package com.selftechy.readdata;

import java.io.FileReader;
import java.io.IOException;
import au.com.bytecode.opencsv.*;

/**
*
*Author - Seetaram Hegde
*
*/
public class CSVdata {

	private static final String FILE_PATH="F:\\Helios-Workspace\\TestData\\products.csv"; // Replace this path with correct path

	public static void main(String[] args) throws IOException {

		CSVReader reader = new CSVReader(new FileReader(FILE_PATH));
		String [] nextLine;
		while ((nextLine = reader.readNext()) != null) {
			System.out.println("ProductID: [" + nextLine[0] + "]\nProductName: [" + nextLine[1] + "]\nSupplierID: [" + nextLine[2] + "]\nCategoryID: [" + nextLine[3] + "]\nQuantityPerUnit: [" + nextLine[4] + "]");
		}

	}
}


Try to execute the above code.  This will fetch the data from the csv file and display on the console.

Above code can be utilized to parameterize the data from a csv file into a Selenium test but needs some tweaking.

Designing Test Automation Framework with Selenium


Do we need to go for Test Automation? If yes, then which is the tool? If we straight away start automating test cases what are all the technical challenges we might face? Do we need a framework for Automation? How we go about designing a framework?

These are all the questions popup when we want to start Test Automation. Okay, let us start exploring answers for the above questions.

If there are hundreds of test scenarios which needs to be executed on each build then it will be a tedious task and error prone.  Because a Test Engineer might make mistakes while entering the test data and output might be wrong.  We can avoid such situations by automating the test cases.

Before selecting a tool for Test Automation, we need to analyze the technologies used for different UI components. For example, Java Swing components, Telerik controls, ExtJS tables, Ajax, Silverlight, Flex / Flash controls, etc. If we want to use Selenium as Test Automation tool then the first and foremost thing needs to be checked is whether the application is a Web Application. If so, then check whether most of the UI controls are identified by the Selenium. If more than 70% of the test cases can be automated then definitely we can go ahead and automate the test cases.

In order to handle large number of test cases we need to have a clear cut strategy for designing the framework. Some of the framework functionalities can be mentioned as follows:

  1. If there is any unhandled exception, then the execution should not stop.  Particular test scenario should be stopped and continue with the next scenario.
  2. Screen shots must be taken for each error so that analyzing the failures should be easy.
  3. Proper exception handling should be done in the framework.
  4. Proper naming convention should be used
  5. Avoid hard coding test data
  6. Test Data should be parameterized using external means such as XMLs, Database, Spreadsheet, etc.
  7. Logs should be created that makes life easier while analyzing the Test Execution
  8. Proper folder structure should be created.


If we need to create a Test Automation Framework with all the above mentioned features (or anything beyond this) for Selenium, then we need to use the programming language as JAVA and Eclipse as the IDE (Integrated Development Environment).

Test Automation Engineers should have knowledge of Java then it makes their life easier for automating the test cases.

We will discuss further about the framework in the next blog post.

Selenium 2 with JUnit4 – Create Tests & Generate Reports


JUnit is a unit testing framework which mostly used for unit testing of Java projects.  JUnit4 is the enhanced version of JUnit 3 and comes with annotations such as @Before, @After, @Test, @AfterClass, @BeforeClass, etc.  (Please refer – http://tinyurl.com/6al62p8 for detailed discussion on these annotations).   JUnit4 can be utilized with Selenium 2.0 WebDriver or Selenium 1.x for Test Automation of web applications.

Now, the question is what if we create our own framework instead of using JUnit Testing Framework for test automation.  There are some pros and cons with this approach.

Advantages:

We can define our own,

  • Report format
  • Logging
  • Exception handling

Disadvantages:

  • Java (Any coding language) coding effort
  • Maintenance is difficult as getting testing resources with Java knowledge will be difficult (Resources with Java experience may not be interested in Automation Testing)

Using JUnit testing framework with Selenium 1.x / Selenium 2.0 WebDriver

Advantages:

  • Very good reporting structure is available
  • Can generate XML, HTML reports
  • There are options available to create test methods, test suites, etc
  • Utilize Selenium IDE or Firebug / Firepath to record test scripts

Disadvantages:

  • We will not be able to define our own reporting format

Let us have a look at the below code.  First let us try to use JUnit 4 with Selenium 1.x (Selenium RC, Selenium Java Client Driver, and Eclipse)

package com.selftechy.parameterization;

/*
*Author - Seetaram Hegde
*Selenium 1.x with JUnit 4
*/
import com.thoughtworks.selenium.*;
import org.junit.After;
import org.junit.Before;
import org.junit.Test;

public class SeleniumOne extends SeleneseTestCase {

	@Before
	public void setUp() throws Exception {
		selenium = new DefaultSelenium("localhost", 4444, "*chrome", "http://www.google.co.in/");
		selenium.start();
	}

	@Test
	public void testSearchGoogle() throws Exception {
		selenium.open("http://www.google.co.in/");
		selenium.type("q", "Selenium with JUnit 4");
	}

	@After
	public void tearDown() throws Exception {
		selenium.stop();
	}
}

Below code is the example for using JUnit 4 with Selenium 2.0 WebDriver

package com.selftechy.selenium2;

/*
*Author - Seetaram Hegde
*Selenium 2 WebDriver with JUnit 4
*/
import org.junit.After;
import org.junit.Before;
import org.junit.Test;
import org.openqa.selenium.By;
import org.openqa.selenium.support.pagefactory.*;
import org.openqa.selenium.WebDriver;
import org.openqa.selenium.WebElement;
import org.openqa.selenium.firefox.FirefoxDriver;
import org.openqa.selenium.server.SeleniumServer;

public class testCode {

	WebDriver driver = new FirefoxDriver();

	@Before
	public void setUp() throws Exception {
		driver.get("http://www.google.com");
	}

	@Test
	public void testAdvancedSearch() throws Exception {
		driver.findElement(By.name("q")).sendKeys("Selenium 2.0 WebDriver");
		driver.findElement(By.name("q")).submit();
		System.out.println("Page title is: " + driver.getTitle());
	}

	@After
	public void tearDown() throws Exception {
		driver.quit();
	}
}

I think the above code snippets will definitely help to differentiate between using Selenium 2 with JUnit 4 and Selenium 1.x with JUnit 4

Refer previous post – http://tinyurl.com/6al62p8 for more information on annotations.

Reports can be generated using either Ant or using TestNG framework.

Visit: Generate HTML Reports with JUnit & Ant